Physical Address
304 North Cardinal St.
Dorchester Center, MA 02124
Physical Address
304 North Cardinal St.
Dorchester Center, MA 02124
Learn what knitting gauge means, how to make a reliable swatch, measure stitch and row gauge after washing, and calculate stitches and rows for your project.
Have you ever followed a knitting pattern carefully, used the recommended yarn and needles, and still ended up with a garment that was too large or too small?
The problem may be your knitting gauge.
Gauge is one of the most important things to check before starting a knitting project. It helps you understand how your stitches and rows translate into the finished dimensions of your fabric.
And here is the secret: a gauge swatch should be measured after it has been washed and dried in the way you intend to care for the finished item. This gives you a much more useful measurement than simply counting stitches straight off the needles.
Let’s look at how to make, prepare, and measure a gauge swatch correctly.
Knitting gauge (also called tension in some patterns) describes the number of stitches and rows in a specific area of knitted fabric.
There are two measurements to understand:
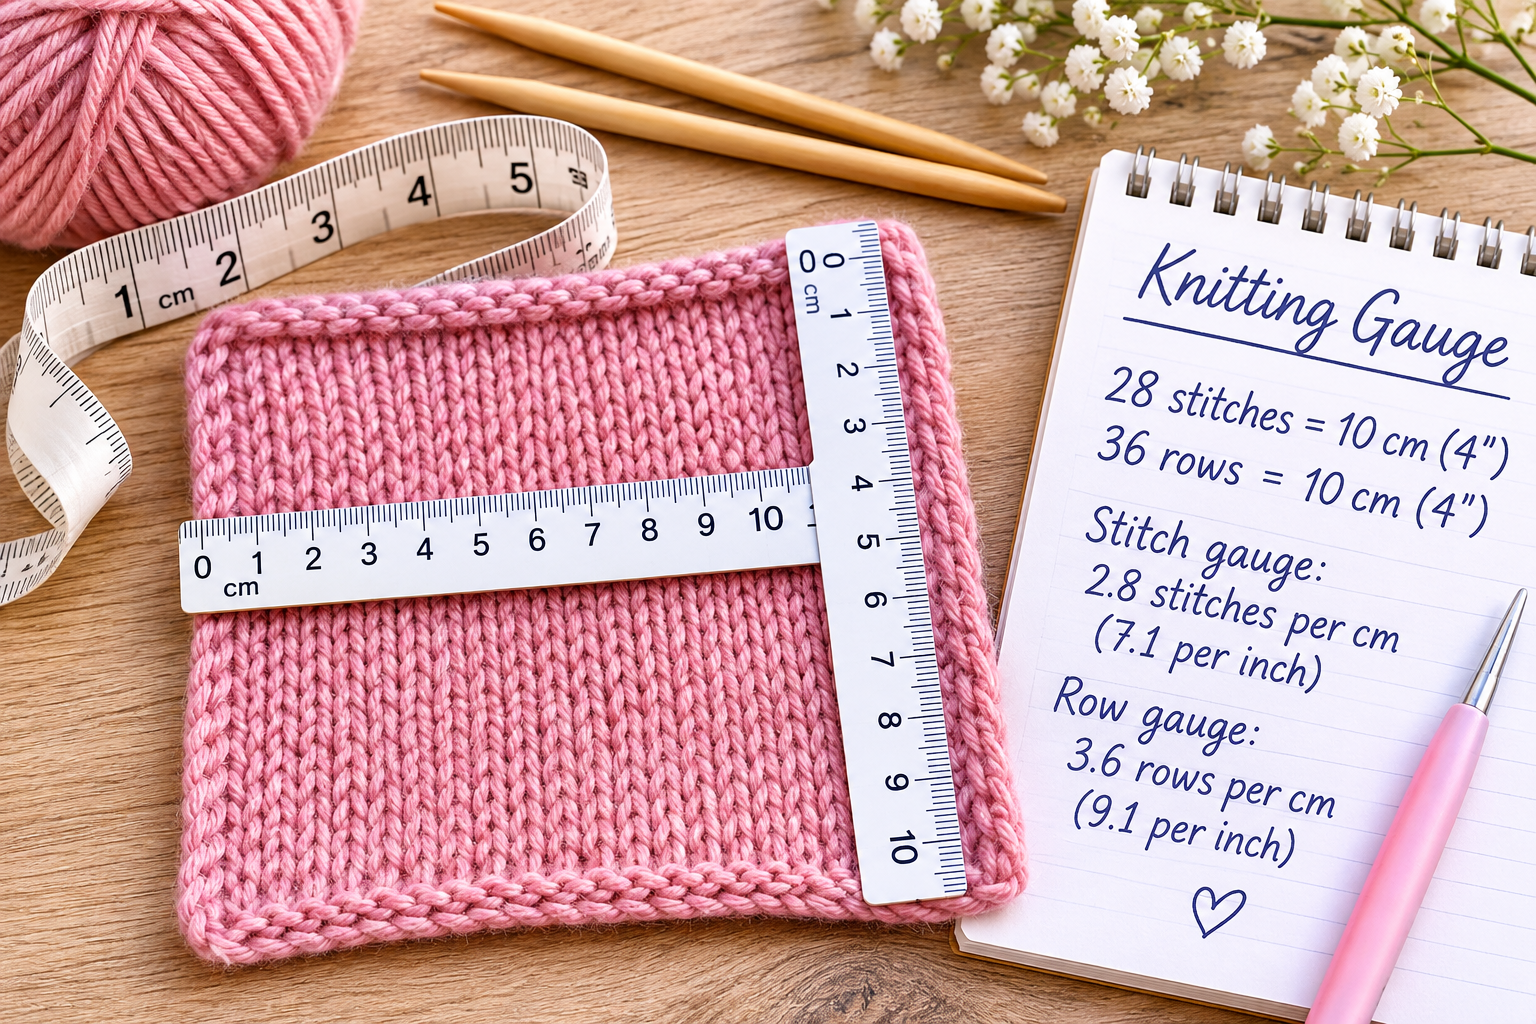
Patterns commonly state gauge as a certain number of stitches and rows over 10 cm (approximately 4 inches).
For example, a pattern might specify:
These measurements help determine the width and length of your finished knitting.
Stitch gauge affects the width of your project, while row gauge affects its length and can also influence shaping.
Every knitter has an individual way of holding the yarn and working the stitches. Even when two people use the same yarn and needle size, their knitting may have different measurements.
A gauge swatch helps you find out whether your knitting matches the pattern before you invest time in the full project.
It also allows you to check:
Taking the time to check gauge before starting can help you avoid discovering a sizing problem much later.
Before making your swatch, read the gauge information in the pattern.
Check which yarn, needle size, and stitch pattern are recommended. Start with the yarn and needle size specified in the pattern, and work your swatch in the same stitch pattern.
If you are using a different yarn, make your swatch with the yarn you intend to use for the project.
It is important to reproduce the actual stitch pattern. A stockinette swatch may not give you the same measurements as a cable, rib, lace, or textured pattern.
If your project uses several different stitch patterns, you may need to check the gauge of more than one of them.
A common mistake is making a swatch that is only 10 × 10 cm (approximately 4 × 4 inches).
This leaves very little room to measure accurately. Stitches near the edges may behave differently from those in the centre.
For a more reliable measurement, aim for a swatch at least 15 × 15 cm (approximately 6 × 6 inches). If your stitch pattern has a repeat, make sure the swatch includes at least two complete repeats. A larger sample may be necessary for wide pattern repeats.
There is no universal number of stitches or rows to cast on. The amount depends on your yarn, needle size, and stitch pattern.
The important thing is to make the sample large enough to measure a representative area in the centre, away from the edges.
If your project is knitted flat, make your swatch flat.
If the garment is knitted in the round, try to make a swatch that imitates circular knitting. Many knitters work knit and purl stitches with slightly different tension. A flat stockinette sample includes both knit and purl rows, while stockinette knitted in the round is worked with knit stitches only.
As a result, a flat swatch may not represent the gauge of a garment knitted entirely in the round.
The closer your swatch is to the actual construction of the project, the more useful its measurements will be.
This is one of the most important steps.
Yarn can change after washing and drying. The fabric may relax, grow, shrink, or change its texture. That is why measuring an unwashed swatch may give you a result that does not represent the finished garment.
Follow the care instructions for your yarn and treat the swatch as you intend to care for the finished item.
Use steam or additional blocking only if the yarn’s care instructions allow it. Do not stretch the fabric to force it to a particular size.
If you are making lace, prepare and block the swatch in the way you intend to block the finished lace item.
Comparing the measurements before and after washing can help you understand how much your particular yarn and stitch pattern change during care.
Once the swatch is completely dry, place it on a flat surface.
Smooth it gently without stretching it. Use a ruler or a knitting gauge ruler to measure an area in the centre of the fabric.
Avoid measuring close to the cast-on edge, bind-off edge, or sides.
Place the ruler horizontally across the fabric.
Count the stitches within the measurement used by your pattern, usually 10 cm or 4 inches.
Turn the ruler vertically.
Count the rows within the same measurement.
If the measurement ends in the middle of a stitch or row, record the partial stitch or row rather than rounding it away. This can make your calculation more accurate.
For a more reliable result, you can repeat the measurement in another area of the centre of the swatch and compare the results.
Important: 10 cm and 4 inches are commonly used as approximate equivalents, but they are not exactly the same length. Use the unit specified in your pattern when comparing your measurements.
Imagine that you count:
To calculate the number of stitches per centimetre:
28 ÷ 10 = 2.8 stitches per cm.
To calculate the number of rows per centimetre:
36 ÷ 10 = 3.6 rows per cm.
Your gauge is therefore:
If you prefer working in inches, these measurements are approximately 7.1 stitches and 9.1 rows per inch.
Write down your results. You will use them when calculating the dimensions of your project.
Once you know your gauge, you can use it to estimate how many stitches and rows are needed for a particular measurement.
If your gauge is given over 10 cm, use these calculations:
Number of stitches = desired width × stitch gauge ÷ 10
Number of rows = desired length × row gauge ÷ 10
Let’s use the gauge from our example:
If you want a piece that is 40 cm wide:
40 × 28 ÷ 10 = 112 stitches.
If you want it to be 60 cm long:
60 × 36 ÷ 10 = 216 rows.
These are basic calculations for a straight piece of knitting. When working on a garment, you must also consider the intended finished measurements and ease, stitch-pattern repeats, edge stitches, shaping, and construction.
Always check that the calculated stitch count works with the pattern instructions.
After measuring your swatch, compare the result with the gauge stated in the pattern.
If you have more stitches over 10 cm than the pattern specifies, your stitches are smaller or tighter. Try making another swatch with larger needles.
If you have fewer stitches over 10 cm, your stitches are larger or looser. Try making another swatch with smaller needles.
After changing the needle size, knit a new sample and repeat the washing, drying, and measuring process.
Do not try to stretch or tighten your knitting artificially to force it to match the required measurements.
Row gauge also deserves attention. Stitch gauge is usually especially important for the width of a garment. Row gauge affects its length and the placement of shaping. If a pattern tells you to knit to a particular measurement, row gauge may be less critical for that section, but it can still matter when shaping depends on a specific number of rows.
Not all stitch patterns behave in the same way.
For example:
That is why it is not reliable to add or subtract a fixed number of stitches for every pattern.
Make a swatch in the stitch pattern you intend to use and measure the fabric after the appropriate care process. This will show you how that particular yarn and stitch combination behaves.
Before starting your project, check that you have completed each step:
A correctly measured gauge swatch is an important step, but it does not guarantee that a finished garment will fit perfectly.
You should also check the finished measurements in the pattern, consider the intended ease, and pay attention to the garment’s construction. Check the fit as you work, especially before completing major sections.
Your swatch gives you valuable information about your yarn, needles, stitch pattern, and knitting tension. Use that information to make more informed decisions before and during your project.
A little preparation before you cast on can make the entire knitting process more predictable and enjoyable.